Optimize Your Prints by Fixing PrusaSlicer Inconsistent First Layer Height
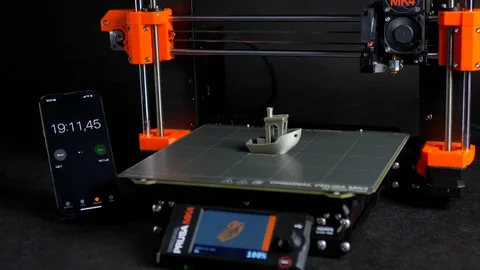
In 3D printing, achieving a flawless first layer is crucial for the overall quality and success of your print. Many users of PrusaSlicer face a common issue: inconsistent first layer height. This problem can lead to poor adhesion, warping, and even print failure. Understanding the causes of PrusaSlicer inconsistent first layer height and applying effective solutions is essential for any maker looking to elevate their 3D printing results.
The first layer serves as the foundation of your print. Any irregularities in this layer can propagate through the rest of the model, causing structural weaknesses and visual imperfections. By addressing the inconsistencies in PrusaSlicer’s first layer settings, users can achieve a smoother, more reliable print. This guide will provide detailed solutions to optimize your first layer performance and ensure your 3D prints meet the highest standards.
Understanding the Causes of PrusaSlicer Inconsistent First Layer Height
Several factors contribute to the problem of PrusaSlicer inconsistent first layer height, ranging from software settings to mechanical issues in your printer. One common cause is improper Z-axis calibration. If the printer’s nozzle is too high or too low, the extruded filament cannot adhere properly to the build plate, creating gaps or squished layers. Even minor deviations can result in noticeable inconsistencies, especially in larger prints where the first layer needs uniform contact across the bed.
Another significant factor is bed leveling issues. Manual or automatic leveling inconsistencies can affect how the filament is deposited. If your print bed isn’t perfectly level, certain areas may have too much or too little material, leading to uneven extrusion. Additionally, surface cleanliness, temperature fluctuations, and filament quality can exacerbate the problem. Identifying the root cause of PrusaSlicer inconsistent first layer height is the first step toward achieving smooth, reliable prints.
Adjusting Z-Offset for Perfect First Layer Adhesion
One of the most effective ways to fix PrusaSlicer inconsistent first layer height is by fine-tuning the Z-offset. The Z-offset determines the distance between the nozzle and the build plate during the first layer. If the distance is too large, the filament won’t stick properly; too small, and the filament can be squashed, causing uneven layering. Most Prusa printers allow users to adjust the Z-offset either directly through the printer interface or via G-code commands in PrusaSlicer.
It’s important to perform a series of test prints when adjusting the Z-offset. Start with small calibration squares or lines across the bed to observe how the filament adheres. Fine-tune the Z-offset incrementally, usually in steps of 0.05 mm, until the first layer appears uniform and slightly squished onto the bed. This approach ensures that each area of the print maintains consistent height and prevents common adhesion issues caused by PrusaSlicer inconsistent first layer height.
Optimizing First Layer Settings in PrusaSlicer
Beyond mechanical adjustments, software settings in PrusaSlicer play a crucial role in first layer consistency. Parameters such as layer height, extrusion width, and print speed should be carefully configured. Increasing the first layer height slightly or widening the first layer extrusion width can improve adhesion and compensate for minor bed irregularities. Slowing down the first layer speed also allows the filament to bond better to the build plate, reducing the chances of gaps or uneven layering.
Another valuable feature in PrusaSlicer is the “First Layer Calibration” tool, which helps users systematically adjust settings for optimal performance. This tool guides you through a series of test prints, allowing you to fine-tune parameters and visualize the effect on first layer height. By combining precise mechanical adjustments with optimized slicer settings, you can significantly reduce the risk of PrusaSlicer inconsistent first layer height, resulting in stronger, more reliable prints from start to finish.
Ensuring Consistent Bed Leveling
Bed leveling is a fundamental step that directly affects first layer performance. Whether your printer uses manual or automatic leveling, maintaining a flat and stable print surface is critical. For manual leveling, use a feeler gauge or a standard piece of paper to ensure that the nozzle is at the correct distance from the bed at multiple points. Automatic leveling systems often require periodic recalibration to maintain accuracy, especially after moving or modifying your printer.
Regular bed maintenance is equally important. Dust, debris, or residue on the print surface can cause uneven filament deposition, contributing to PrusaSlicer inconsistent first layer height. Clean the bed thoroughly before each print using isopropyl alcohol or other recommended cleaning solutions. Additionally, using bed adhesives like glue sticks or specialized build surfaces can improve filament adhesion and help maintain uniform first layer height across your prints.
Advanced Tips to Combat Inconsistent First Layer Height
For users still experiencing issues despite calibration and proper slicer settings, several advanced techniques can help. One option is to enable adaptive first layer settings in PrusaSlicer, which allows the software to dynamically adjust extrusion based on bed topology. This feature can compensate for minor variations in the build plate, ensuring a consistent first layer throughout the print. Layer fan speed, flow rate, and nozzle temperature can also be fine-tuned to optimize adhesion and extrusion consistency.
Another effective approach is performing regular printer maintenance. Worn-out nozzles, loose belts, or uneven rods can all affect first layer height. Ensuring your printer is mechanically sound will reduce the likelihood of PrusaSlicer inconsistent first layer height. Additionally, running small calibration prints before larger projects can serve as a final check to ensure all settings are optimized. By combining software precision with mechanical reliability, you can achieve consistently high-quality 3D prints every time.
Conclusion
Fixing PrusaSlicer inconsistent first layer height requires a combination of mechanical adjustments, software optimization, and regular maintenance. Understanding the underlying causes, fine-tuning Z-offset, configuring slicer settings, ensuring precise bed leveling, and applying advanced techniques can dramatically improve first layer quality. By prioritizing these steps, 3D printing enthusiasts can prevent adhesion issues, reduce warping, and create stronger, more visually appealing prints.
Consistent first layers form the foundation for successful 3D printing. With patience and careful calibration, even complex prints can achieve professional-level quality. Addressing PrusaSlicer inconsistent first layer height is not just about fixing a minor annoyance—it’s about elevating your entire printing workflow to produce flawless results, one layer at a time.